|
|
|
|
|
|

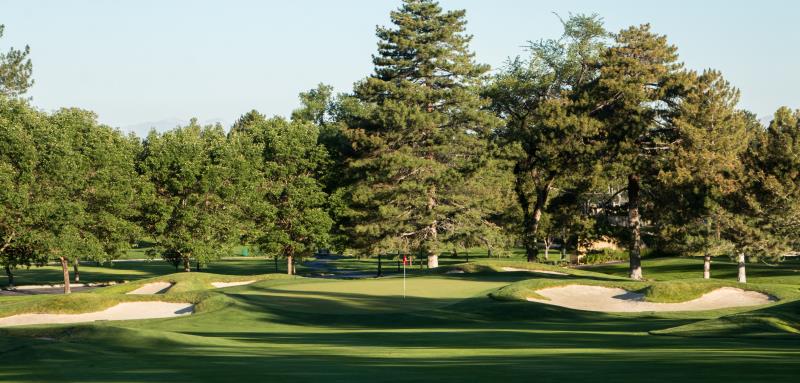
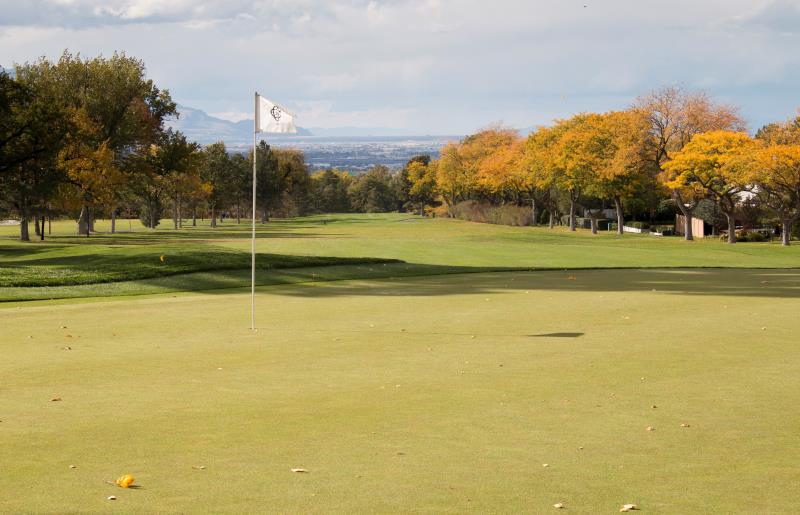
Hole #1
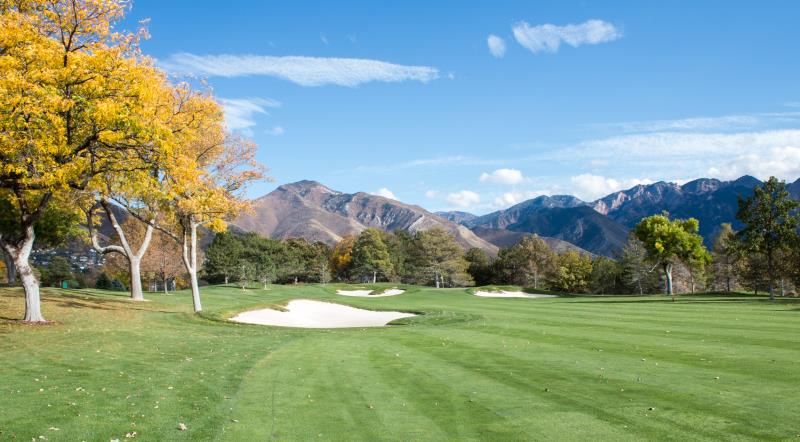
A challenging start to The Country Club is an uphill, dogleg right which requires a good tee shot avoiding the fairway bunker and trees that guard the entire right side. The approach is to an elevated green, bunkered on all sides, with a deceptive gentle slope from the back to the front. Par is a good score to start your round.
|
Black Tee/Blue Tee
421/392
|
White Tee/Green Tee
363/332
|
Par (Men's/Ladies')
4/4
|
Handicap (Men's/Ladies')
6/7
|

Hole #2
A strong par 3 with a nice-sized green for your target. Avoid the deep bunkers on the left and right side of the green. The safe play is to be a little short leaving you a simple uphill pitch.
|
Black Tee/Blue Tee
222/183
|
White Tee/Green Tee
163/137
|
Par (Men's/Ladies')
3/3
|
Handicap (Men's/Ladies')
18/17
|
Hole #3
A straightaway hole with a generous fairway off the tee. Avoiding the left side fairway bunker will leave you with a blind second shot over the crest to a downhill fairway and a good chance of reaching this relatively small, well-bunkered and deceivingly-sloped green. A nice birdie opportunity early on.
|
Black Tee/Blue Tee
511/496
|
White Tee/Green Tee
472/435
|
Par (Men's/Ladies')
5/5
|
Handicap (Men's/Ladies')
8/3
|
Hole #4
Challenge the left-side fairway bunkers on this long dogleg left and be rewarded with a shorter approach. Those playing away from the bunkers will be left with a much longer shot into this well bunkered green. Once reaching the green, with its many undulations, you will have putts with a subtle, and in many cases, severe slope.
|
Black Tee/Blue Tee
430/404
|
White Tee/Green Tee
363/336
|
Par (Men's/Ladies')
4/4
|
Handicap (Men's/Ladies')
2/9
|
Hole #5
A hole where your driver is not always needed off the tee. Avoiding the two fairway bunkers that protect this short dogleg right will leave you with a comfortable second shot to a green that has a severe slope to the front.
|
Black Tee/Blue Tee
376/355
|
White Tee/Green Tee
332/306
|
Par (Men's/Ladies')
4/4
|
Handicap (Men's/Ladies')
12/11
|
Hole #6
An uphill, elevated green makes club selection a premium on this par three. A large steep-faced bunker fronting the green should be avoided. Trust your club of choice and play to the center of the green. Once on the green, you are left with a fairly simple putt that may have some gentle break toward the valley.
|
Black Tee/Blue Tee
177/165
|
White Tee/Green Tee
150/128
|
Par (Men's/Ladies')
3/3
|
Handicap (Men's/Ladies')
16/15
|
Hole #7
Avoid the out of bounds left and the fairway bunkers which frame this gradual uphill straight par four. The approach will be a good challenge to an elevated, narrow and well-bunkered green. You are best to keep below the hole. This green can be extremely fast on putts that work away from the mountains.
|
Black Tee/Blue Tee
396/384
|
White Tee/Green Tee
346/321
|
Par (Men's/Ladies')
4/4
|
Handicap (Men's/Ladies')
10/5
|
Hole #8
Another short hole where your driver may not be needed. Trees left, which protect the out of bounds running the entire length of the hole, and the fairway bunkers right, make this a demanding tee shot. Longer hitters have a chance of nearly reaching this green with a well struck shot. The front-left and back-right bunkers are both in play with a deceiving approach to a green that has a subtle slope from front to back.
|
Black Tee/Blue Tee
376/347
|
White Tee/Green Tee
330/321
|
Par (Men's/Ladies')
4/4
|
Handicap (Men's/Ladies')
14/13
|

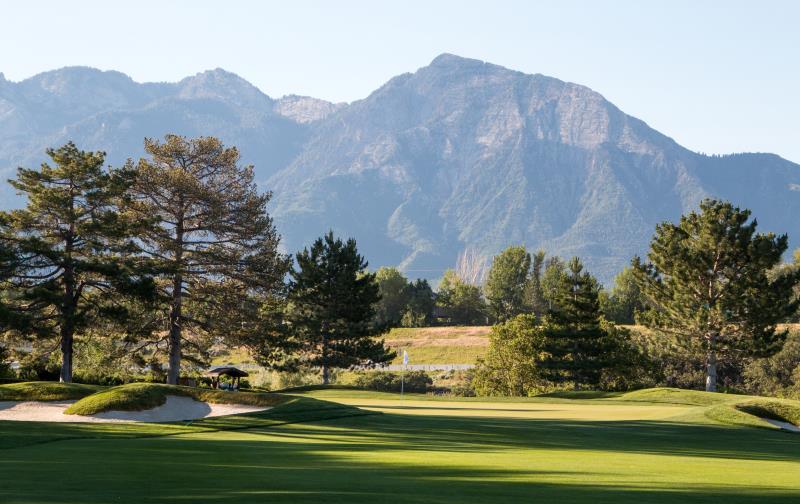
Hole #9
One of the best views of the Salt Lake valley that you will find. A downhill tee shot to the widest fairway on the course, gives an opportunity to challenge the ravine that separates the fairway and the green complex. This is an inviting, yet deceiving hole with a fairway sloping toward the ravine and out of bounds the entire left side. This hole can distract you as you are playing toward the clubhouse. After navigating the tee shot, you will be left with options. The safe play is to lay up over the canyon, staying right of the green. A more aggressive approach is to challenge the green with a second shot from a slight downhill lie with a carry over the canyon to a receptive green; a true risk/reward approach. The green is bunkered on all sides, yet the size of the green makes it very playable from any location.
|
Black Tee/Blue Tee
554/502
|
White Tee/Green Tee
481/460
|
Par (Men's/Ladies')
5/5
|
Handicap (Men's/Ladies')
4/1
|
Hole #10
This is the longest par three at The Country Club. The yardage and club selection is the challenge due to a major elevation change from tee to green. Being as downhill as it is, the hole plays shorter, but still requires an accurate shot, avoiding large bunkers on either side of the green awaiting errant shots. Upon reaching the green, you are left with a challenge due to its size and slopes.
|
Black Tee/Blue Tee
254/237
|
White Tee/Green Tee
185/180
|
Par (Men's/Ladies')
3/3
|
Handicap (Men's/Ladies')
15/18
|

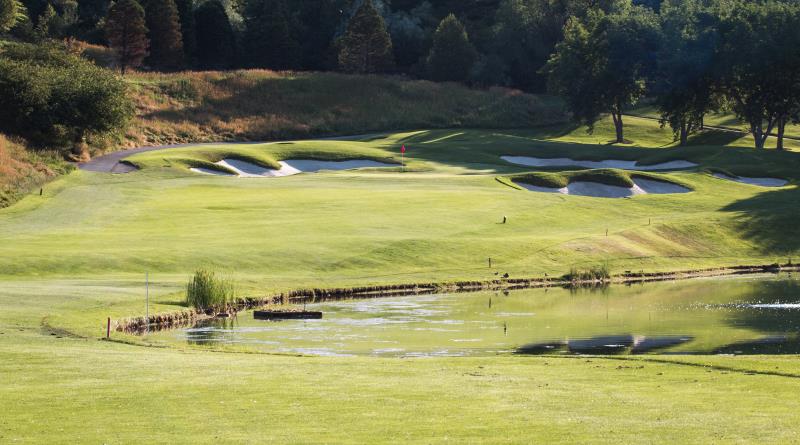
Hole #11
The signature hole of The Country Club requires your best from tee to green. The tee shot must avoid Parley’s Creek, which runs the entire left side of this slight dogleg left. Navigating the fairway between the creek and right side bunkers leave you with another challenge. The green is protected by Parley’s Creek which fronts and wraps around the entire right side. The safe option is to play short of the creek leaving a short pitch to a slightly elevated green. Catch your breath while crossing the ‘Branca Bridge’ that leads to a gently sloping green from back to front.
|
Black Tee/Blue Tee
467/440
|
White Tee/Green Tee
380/420
|
Par (Men's/Ladies')
4/5
|
Handicap (Men's/Ladies')
1/2
|

Hole #12
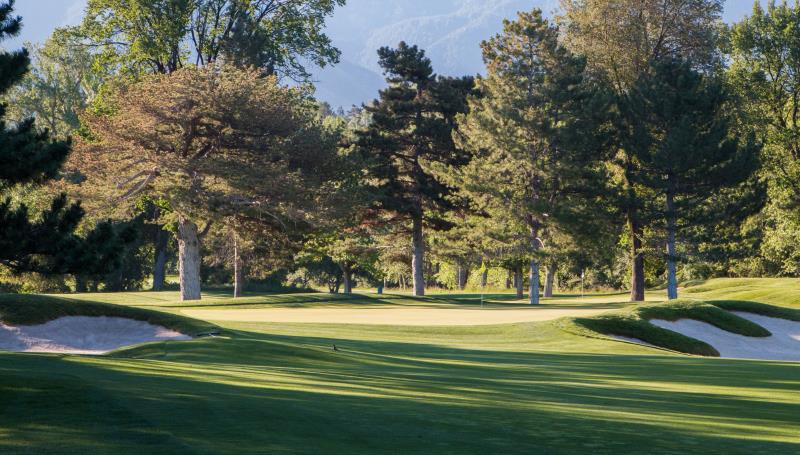
Hole #12 is a deceptively difficult short hole. Parley’s creek feeds the estuary fronting and then wraps to the left of this long and narrow green. Bunkers to the right await the errant shot avoiding the creek. Trust your club selection and play to the middle of this subtly-sloped green.
|
Black Tee/Blue Tee
187/155
|
White Tee/Green Tee
135/166
|
Par (Men's/Ladies')
3/3
|
Handicap (Men's/Ladies')
17/16
|
Hole #13
Another challenging tee shot awaits, as two large fairway bunkers loom to the right and Parley’s Creek meanders the entire left side of this long par five. A generous landing area for your second shot leaves a shorter approach shot to a slightly-elevated green. Avoiding the left greenside bunker and severe slope to the right will leave you a with a good opportunity.
|
Black Tee/Blue Tee
575/541
|
White Tee/Green Tee
456/435
|
Par (Men's/Ladies')
5/5
|
Handicap (Men's/Ladies')
3/4
|
Hole #14
A gentle dogleg right requires a tee shot between the right- and left-side fairway bunkers. Favoring the left side of the fairway will keep you from the severe native drop-off, which protects the entire right side. The approach to this green requires a precise shot to avoid the deep bunkers fronting this elevated green. This green can be deceiving, being much deeper than it appears.
|
Black Tee/Blue Tee
387/358
|
White Tee/Green Tee
330/320
|
Par (Men's/Ladies')
4/4
|
Handicap (Men's/Ladies')
13/10
|

Hole #15
This downhill dogleg right gives the opportunity to challenge the hole with a tee shot over the trees guarding the right side. Playing to the corner of this dogleg leaves you with a longer approach to a well-protected green. Avoiding the deep bunkers which surround this entire green is key to having success on this hole.
|
Black Tee/Blue Tee
437/392
|
White Tee/Green Tee
337/295
|
Par (Men's/Ladies')
4/4
|
Handicap (Men's/Ladies')
11/14
|
Hole #16
A fairly straight hole with trees left and a strategically-placed fairway bunker framing the right. A tee shot left of center leaves a mid-range approach to a long, narrow and well-bunkered green. The green is slightly elevated and the ball has a tendency to roll toward the back.
|
Black Tee/Blue Tee
427/400
|
White Tee/Green Tee
329/295
|
Par (Men's/Ladies')
4/4
|
Handicap (Men's/Ladies')
9/12
|
Hole #17
A long dogleg right with a large fairway bunker that protects the corner of this challenging hole. With a good tee shot you are left with a second shot needing to avoid the native area left, trees right, and the cross-fairway bunker well short of the green. The green is large and has a deep bunker fronting that needs to be avoided. One of the flatter greens on the course should pose no real problems.
|
Black Tee/Blue Tee
552/526
|
White Tee/Green Tee
480/405
|
Par (Men's/Ladies')
5/5
|
Handicap (Men's/Ladies')
7/6
|
Hole #18
One of the harder finishing holes you are going to play. An uphill tee shot that must avoid Parley’s Creek to the right and trees near a small creek to the left. The fairway has a gentle slope to the left so this hazard does come into play. For the longer hitters, and those playing from the forward tees, there is a hidden pond which comes into play through the end of the fairway. From the sloped fairway, you are left with a long approach to an extremely uphill elevated green. The right greenside bunker is deep and should be avoided. Any shots missed far to the right will find the water hazard which sits down below the fairway. The large green has gradual slope from the back to the front which makes putting an earnest challenge to end your round.
|
Black Tee/Blue Tee
461/414
|
White Tee/Green Tee
372/301
|
Par (Men's/Ladies')
4/1
|
Handicap (Men's/Ladies')
5/8
|
|
|
|
|
|
|